In this article, we will add token-based authentication REST API with Django Rest Framework and Djoser. The Django Rest Framework is a package for faster building REST APIs with Django. The Djoser provides basic views to handle authentication actions such as create user, login, logout.
We are going to use a code from previous post (it has tag v2). We will write only backend code (authentication REST API) in this post. You can find the details about frontend code in the next post: React Token Based Authentication to Django Backend.
What are we going to do:
- We will install Django Rest Framework (DRF) and Djoser packages.
- We will setup settings and urls for authentication REST API.
- User will be able to signup with username and password.
- User will be able to login, get her profile, and logout.
- We will manually test our REST API with DRF browsable API.
What are we not going to do in this post:
- We are not going to provide example how to do user activation and password reset. This will require email verification and sending activation/reset links with email. This topic will be covered in the future post (it will be available soon). Would you like to be notified when it will be ready? Please let me know by filling this form.
Token-based vs JWT authentication
There are many ways to implement authentication in DRF (docs). The popular ones are:
What is the difference between them?
- Token-based authentication requires database look up on every request to check if token is valid.
- JWT is using cryptography to validate the token - no database queries.
- Token-based authentication is using the same token for all sessions.
- JWT is using different token for each session (even if the same user is logged from many devices).
- Token-based tokens doesn’t have a timestamp for expiration time.
- JWT tokens expire after selected time period and need to be refreshed.
- For Token-based authentication you can force user to logout by changing the token in the database.
Both authentication methods have pros and cons. In this post, I will use Token-based authentication. It doesn’t need to be periodically refreshed and because of this, it will be much easier to use it in the frontend. If you would like to see a JWT post, please let me know by filling this form.
Install DRF and Djoser
Please go to backend directory and activate the environment:
# activate environment
cd backend
source /venv/bin/activate
Let’s install DRF, please notice that additional packages are also installed: markdown and django-filter (they will be needed for browsable API and filtering support):
pip install djangorestframework==3.11.2
pip install markdown
pip install django-filter
The Djoser package installation:
pip install djoser
Let’s update the backend/requirements.txt file:
# requirements.txt file
django==3.1.2
djoser==2.0.5
djangorestframework==3.11.2 # https://github.com/sunscrapers/djoser/issues/541
markdown==3.3
django-filter==2.4.0
Notice: We install DRF in version 3.11.2 because compatibility issue with Djoser (see github issue).
Configure Django settings
Please update backend/server/server/settings.py file with needed configuration:
# backend/server/server/settings.py file

# ... please find INSTALLED_APP list and update it

INSTALLED_APPS = [
    'django.contrib.admin',
    'django.contrib.auth',
    'django.contrib.contenttypes',
    'django.contrib.sessions',
    'django.contrib.messages',
    'django.contrib.staticfiles',
    #
    'rest_framework',
    'rest_framework.authtoken',
    'djoser'
]

#configure DRF
REST_FRAMEWORK = {
    'DEFAULT_AUTHENTICATION_CLASSES': (
        'rest_framework.authentication.TokenAuthentication',
    ),
    'DEFAULT_PERMISSION_CLASSES': [
        'rest_framework.permissions.IsAuthenticated',
    ]
}

# configure Djoser
DJOSER = {
    "USER_ID_FIELD": "username"
}

# ...
Add Authentication Endpoints to Django
We need to add URL endpoints to our backend. The URLs will be provided by the Djoser package. There is a list of all available endpoints in Djoser documentation.
In this post, we will use the following endpoints:
/users/- to signup a new user,/users/me/- to get user information,/token/login/- to get token,/token/logout/- to logout.
(Endpoints for account activation and password rest will be used in the future post.)
We can add endpoints directly into backend/server/server/urls.py file. However, in this series of post we would like to build a complete boilerplate for creating SaaS applications, because of this let’s add a Django app accounts. It will be needed in the future, for example for account activation or payments. For now, we will just fill urls.py file.
To add new application in Django please run the following commands:
# please run in backend/server directory
django-admin startapp accounts
mkdir apps
mv accounts apps
I made the additional directory apps to keep all applications in it. It will help to keep the whole project well organized (I like it that way).
Please add a new file urls.py in backend/server/apps/accounts with the following content:
# backend/server/apps/accounts/urls.py file

from django.conf.urls import url, include

accounts_urlpatterns = [
    url(r'^api/v1/', include('djoser.urls')),
    url(r'^api/v1/', include('djoser.urls.authtoken')),
]
The above file adds Djoser’s endpoints to our application. Please notice that I’ve added api/v1/ in the url definition. It will be added for all endpoints. Maybe you will need it to track API versions in the future. We need to update main urls at backend/server/server/urls.py to have endpoints available in the web server:
# backend/server/server/urls.py

from django.contrib import admin
from django.urls import path

from apps.accounts.urls import accounts_urlpatterns

urlpatterns = [
    path('admin/', admin.site.urls),
]

urlpatterns += accounts_urlpatterns # add URLs for authentication
Your backend directory structure should look like below:
.
├── apps
│   └── accounts
│       ├── admin.py
│       ├── apps.py
│       ├── __init__.py
│       ├── migrations
│       │   └── __init__.py
│       ├── models.py
│       ├── tests.py
│       ├── urls.py
│       └── views.py
├── db.sqlite3
├── manage.py
└── server
    ├── asgi.py
    ├── __init__.py
    ├── settings.py
    ├── urls.py
    └── wsgi.py
We need to add new app in backend/server/server/settings.py:
# backend/server/server/settings.py file
# ...

INSTALLED_APPS = [
    'django.contrib.admin',
    'django.contrib.auth',
    'django.contrib.contenttypes',
    'django.contrib.sessions',
    'django.contrib.messages',
    'django.contrib.staticfiles',
    #
    'rest_framework',
    'rest_framework.authtoken',
    'djoser', # remember about comma!
    #
    'apps.accounts' # add new application
]

# ...
OK, we are ready to check our endpoints!
Please apply database migrations:
# please run in backend/server directory
./manage.py migrate
Note: We don’t need to run ./manage.py makemigrations because we do not add any new models. We use models from Django and DRF, that’s why we need to run migrate.
Manually Test Authentication REST Endpoints
For checking REST API endpoints I will use browsable DRF API, which is amazing (in my opinion)!
Let’s start the server:
# please run in backend/server directory
./manage runserver
Please go to http://127.0.0.1:8000 and you should see:
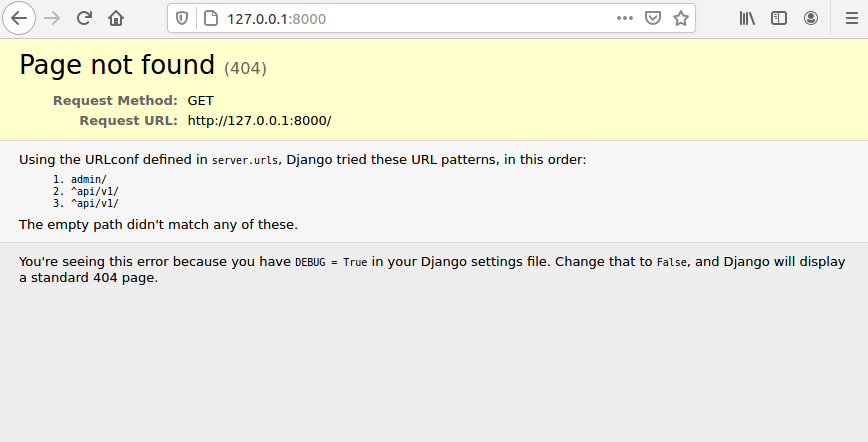
Don’t be afraid of errors. Just read their message and try to understand how to fix them.
It is expected because we don’t have any endpoint at /. Please go to http://127.0.0.1:8000/api/v1/users:

Please fill the form at the bottom of the page and click POST. This will create a new user. The email field is not required, you can leave it blank.
Please change the url to http://127.0.0.1:8000/api/v1/token/login:
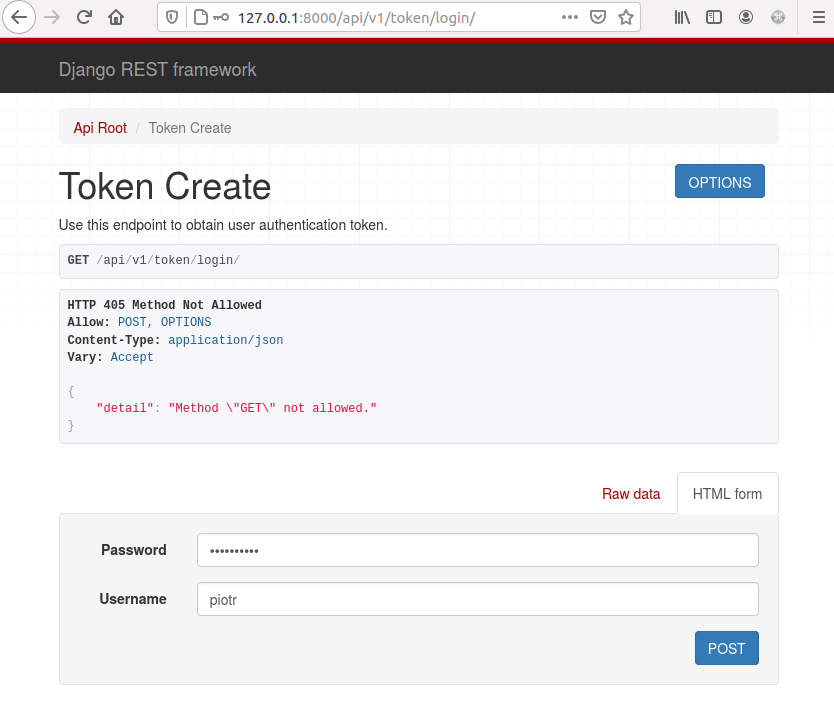
Please fill the form at the bottom and click POST. You should see a screen like below:
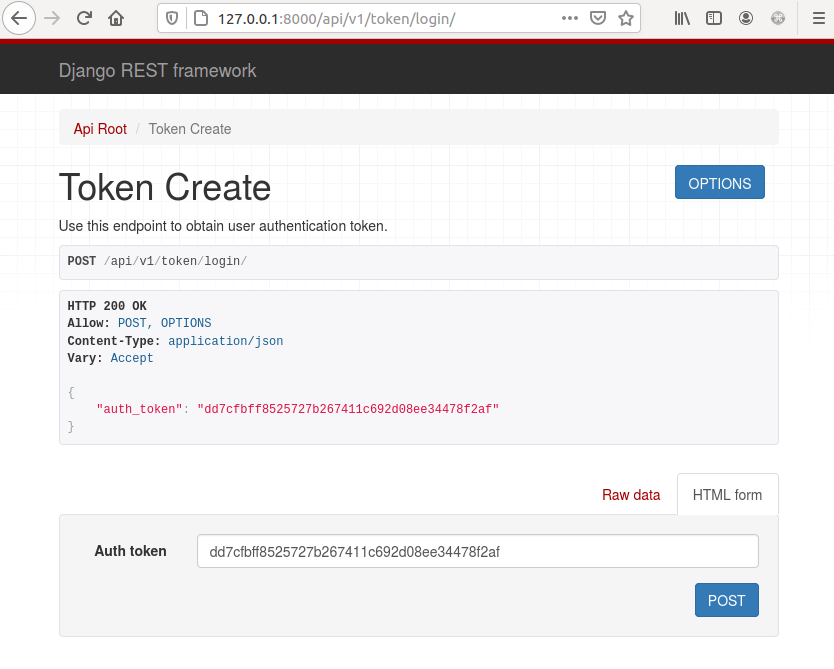
The endpoint returned the token:
{
    "auth_token": "dd7cfbff8525727b267411c692d08ee34478f2af"
}
We will need to include this token in each request that requires authentication. Please try to get the user information with http://127.0.0.1:8000/api/v1/users/me/ you should see:
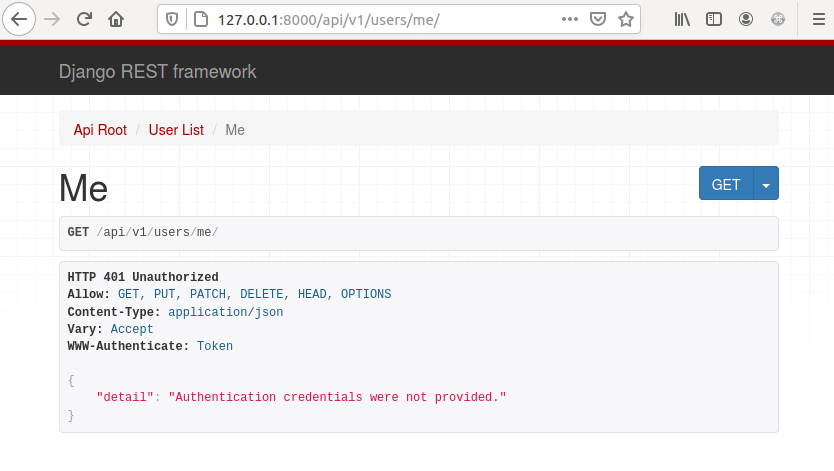
You see the error HTTP 401 Unauthorized with message that authentication credentials are not provided.
The browsable DRF API doesn’t support authorization with token, so there are 2 ways to enable it:
- add session based authentication for testing (I don’t like it),
- add free browser plugin to inject token in request’s header (that’s my option).
I’m using free ModHeader plugin. It is availble for many browsers (Chrome, Firefox, Opera, Edge).
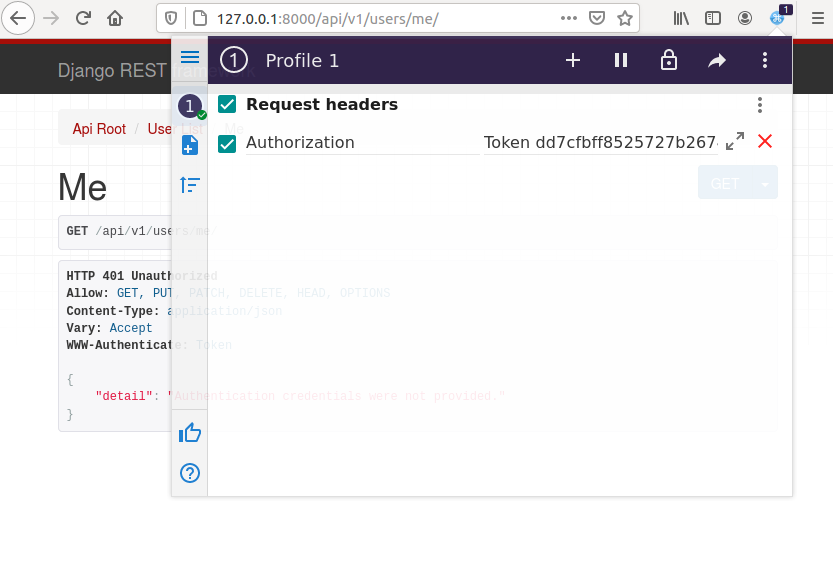
Notice: You need to set a token in the form Token dd7cfbff8525727b267411c692d08ee34478f2af - there is no colon here!
After setting the token in the header please just refresh the website.
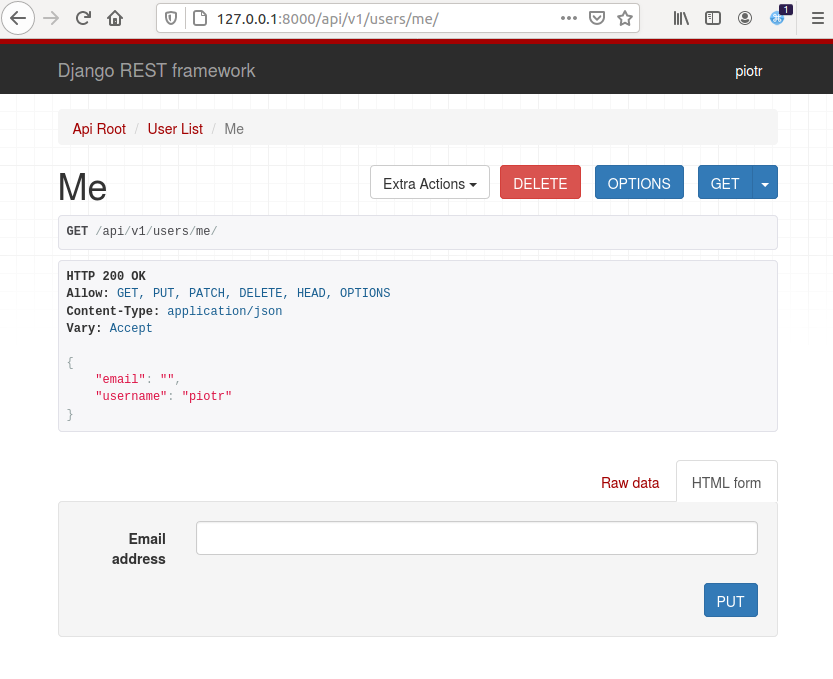
The endpoint returns the JSON with user information:
{
    "email": "",
    "username": "piotr"
}
Please go to http://127.0.0.1:8000/api/v1/token/logout to logout. You should click POST button to logout. After that, please try to login again (remember to uncheck header in ModHeader plugin). You should get a different auth_token than for the first time. The Djoser package is creating a new token at login and detroying the token after logout. This is a very nice feature for security. If someone steal your auth_token (for example, you forgot to logout in the public computer) then just logout (on different device) and token will be invalid.
Commit changes to the repository
Please remember to update the repository with recent changes:
git add apps
git commit -am "add backend authentication"
git push
Summary
- We’ve created authentication REST API with Django Rest Framework.
- User is able to create account with username and password.
- There is login and logout endpoints available, and endpoint with user information.
- The user activation and password reset functionality will be presented in the future post.
Note: In this post, we do not cover the CORS headers problem. It will be covered in the next post.
What’s next?
We will write a React code that use REST API for authentication and CORS handling. What is more, we will add authentication redirects in React.
Next article: React Token Based Authentication to Django Backend.
Let's stay in touch!
Would you like to be notified about new posts? Please fill this form.
Boilerplate Tutorial Articles:
1. Starting SaaS with Django and React
2. React Routing and Components for Signup and
Login
3. Token Based Authentication with
Django Rest Framework and Djoser
(↩ you are here!)
4. React Token Based Authentication to Django REST
API Backend
5. React Authenticated Component
6. CRUD in Django Rest Framework and React
7. Docker-Compose for Django and React with
Nginx reverse-proxy and Let's encrypt certificate
8. Django Rest Framework Email Verification
9. Django Rest Framework Reset Password
More articles coming soon!
Link to the code repository: saasitive/django-react-boilerplate