The most exciting moment of the web application development is a deployment. Your app is going live! It can also be nerve-wracking moment. Unfortunately. There are many options, many variables and configurations. It is easy to miss something … In this article, I will show you how to pack Django and React application into containers and deploy them with
 docker-compose. The presented approach can be reused on any Cloud Provider (AWS, DigitalOcean, Linode, GCP, Heroku) - you just need a Virtual Private Server (VPS).
In this article:
- We will create two
docker-composeconfiguration files. One for development (easier version) and one for production (with SSL certificate from Let’s Encrypt). - The React static files will be served by
nginx. - The Django static files (from admin and DRF browsable API) will be served by
nginx. - The
nginxwill be reverse-proxy to the Django server (gunicorn). - In the production, we will add
certbotto renew the certificate. To issue a certificate we will use a bash script. You need to have a domain to issue the certificate .
We will be using code from the previous article: CRUD in Django Rest Framework and React (code with tag v6).
Create Dockerfile for Django and Nginx
Let’s start by adding a new directory docker in the main directory of the project. Your project structure should look like below:
.
├── backend
├── docker
├── frontend
├── LICENSE
└── README.md
In the docker directory please add backend directory with two files:
docker/backend/Dockerfile- it will define how to build Django container,docker/backend/wsgi-entrypoint.sh- it will be entrypoint for Django container. It will apply migrations, collect static files and run WSGI server withgunicorn.
Django Dockerfile
The Dockerfile to build Django container:
# docker/backend/Dockerfile

FROM python:3.8.3-alpine

WORKDIR /app
ADD ./backend/requirements.txt /app/backend/


RUN pip install --upgrade pip
RUN pip install gunicorn
RUN pip install -r backend/requirements.txt

ADD ./docker /app/docker
ADD ./backend /app/backend
In this Dockerfile the python:3.8.3-alpine is used as base image. Let’s decode this image name and tag. It contains python in version 3.8.3, running in the Linux distribution Alpine which is lightweight. The purpose of using lightweight Linux is to have small image which will result in faster builds. You can of course use different base image. For purpose of this tutorial the python:3.8.3-alpine is sufficient.
We create /app directory in the container and copy /backend/requirements.txt. Then, gunicorn and all needed packages are installed. The backend source code is copied at the end of the container build. It is on purpose. It makes building faster. When you change something in the code (without changing the requirements.txt file), only the last line of the Dockerfile will be executed and the rest will be read from cache (of course if available).
The Dockerfile is not executing any command, we will use wsgi-entrypoint.sh script for this purpose.
Docker entrypoint
Please add a new file docker/backend/wsgi-entrypoint.sh and add execute rights to the file (it is a bash script):
# add execute rights
chmod +x docker/backend/wsgi-entrypoint.sh
The docker/backend/wsgi-entrypoint.sh file:
#!/bin/sh

until cd /app/backend/server
do
    echo "Waiting for server volume..."
done

until ./manage.py migrate
do
    echo "Waiting for db to be ready..."
    sleep 2
done

./manage.py collectstatic --noinput

gunicorn server.wsgi --bind 0.0.0.0:8000 --workers 4 --threads 4

#####################################################################################
# Options to DEBUG Django server
# Optional commands to replace abouve gunicorn command

# Option 1:
# run gunicorn with debug log level
# gunicorn server.wsgi --bind 0.0.0.0:8000 --workers 1 --threads 1 --log-level debug

# Option 2:
# run development server
# DEBUG=True ./manage.py runserver 0.0.0.0:8000
The above script is waiting till serever volume and database is ready. It runs migration on database and collect static files. It runs gunicorn server with IP address 0.0.0.0 and (docker default IP) and port 8000.
The gunicorn is running 4 workers with 4 threads each. You can set different numbers here. It depends on your machine. There are some heuristic rules that set number of workers as 4 * CPU cores (see the gunicorn docs). If you are deploying application to machine with 1 CPU core, then you can use 4 workers. (Remember, it is just heuristic not an exact rule). Then you can specify how many threads will be running in each worker. In our case, there are 4 threads (gunicorn docs). This means that we can process 4 * 4 = 16 concurrent requests.
1st Note: We are using SQLite for our development - it doesn’t support concurrency. We will need to replace SQLite with advanced database engine like PostgreSQL. I will replace database at the end of this tutorial to make final deployment. I think it is good to deploy application. We will practice deployment and code updates in the production. That’s why we are here.
2nd Note: One more thing, I added other options to run Django server in wsgi-entrypoint.sh which are commmented. Why? You might need them for debugging. The first option add logging to the console with debug level and run gunicorn with one worker and single thread. The second option runs Django development server with DEBUG=True. It needs setting environment variable and load it in settings.py with python-decouple (for example), I will write about this in the future post.
Django static files
Before going further, let’s update STATIC_URL variable in the backend/server/server/settings.py:
# backend/server/server/settings.py

MEDIA_URL = '/media/'
STATIC_URL = '/django_static/'
STATIC_ROOT = BASE_DIR / 'django_static'
We overwrite STATIC_URL with a new value. All static files will be served with /django_static/ in the URL. We add two new variables:
MEDIA_URL- it is URL for serving files uploaded to Django application, we will use it in future posts.STATIC_ROOT- it is a directory where static files from Django application will be stored after runningcollectstaticcommand. Thenginxwill point to this path.
Nginx Dockerfile and Configuration
Please add nginx directory in the docker directory. There will be added three files:
docker/nginx/Dockerfile- the instructions how to buildnginxcontainer image,docker/nginx/development/default.conf- the configuration file fornginxserver used in the development,docker/nginx/production/default.conf- the configuration file for the production.
The Dockerfile for nginx container will use two stage build.
- At first stage, we build the React static files.
- At second stage, the static files are copied and
nginxserver starts. We copy React static files into/usr/share/nginx/htmldirectory.
The docker/nginx/Dockerfile file:
# The first stage
# Build React static files
FROM node:13.12.0-alpine as build

WORKDIR /app/frontend
COPY ./frontend/package.json ./
COPY ./frontend/package-lock.json ./
RUN npm ci --silent
COPY ./frontend/ ./
RUN npm run build

# The second stage
# Copy React static files and start nginx
FROM nginx:stable-alpine
COPY --from=build /app/frontend/build /usr/share/nginx/html
CMD ["nginx", "-g", "daemon off;"]
At the second stage, we copy only the final product of the first stage: static files. The node_modules (they can take a lot of space) with dependency files are not in the final image. Such two stage-build makes the size of the final image smaller.
Let’s add nginx configuration for development version of docker-compose (without SSL certificate):
server {
    listen 80;
    server_name _;
    server_tokens off;
    client_max_body_size 20M;

    location / {
        root   /usr/share/nginx/html;
        index  index.html index.htm;
        try_files $uri $uri/ /index.html;
    }

    location /api {
        try_files $uri @proxy_api;
    }
    location /admin {
        try_files $uri @proxy_api;
    }

    location @proxy_api {
        proxy_set_header X-Forwarded-Proto https;
        proxy_set_header X-Url-Scheme $scheme;
        proxy_set_header X-Forwarded-For $proxy_add_x_forwarded_for;
        proxy_set_header Host $http_host;
        proxy_redirect off;
        proxy_pass   http://backend:8000;
    }

    location /django_static/ {
        autoindex on;
        alias /app/backend/server/django_static/;
    }
}
What do you feel when you see
nginxconfiguration file?
No troubles! The nginx is here to help us. It will do what we will ask in the configuration.
server {
    listen 80;
    server_name _;
    server_tokens off;
    client_max_body_size 20M;
At the begining of the configuration we define a server (server keyword). It will listen on port 80 (it is a default HTTP port). There is no name assigned to the server (server_name _;). We switch off option to show server version on error pages (server_token off; see docs). The last setting is to set maximum request size (see docs) (client_max_body_size 20M). It means that requests larger than 20MB will result in error with HTTP 413 (Request Entity Too Large).
We have five location blocks (location docs) in the config which specify configuration for each URL (routing for requests).
The first location / defines what to do if the request comes from / (main domain or IP). The index.html file from /usr/share/nginx/html will be served as a response. It is our React static index.html file.
    location / {
        root   /usr/share/nginx/html;
        index  index.html index.htm;
        try_files $uri $uri/ /index.html;
    }
The second and third locations location /api and location /admin redirect requests to location @proxy_api. It is a reverse-proxy:
    location /api {
        try_files $uri @proxy_api;
    }
    location /admin {
        try_files $uri @proxy_api;
    }
What we have in fourth location @proxy_api? It is our Django application served with gunicorn. The nginx forwards all requests with /api and /admin in the URL to http://backend:8000 which is the address of the Django application in the docker-compose:
    location @proxy_api {
        proxy_set_header Host $http_host;
        proxy_redirect off;
        proxy_pass   http://backend:8000;
    }
The last location /django_static/ serves static files from the Django application (created with collectstatic command):
    location /django_static/ {
        autoindex on;
        alias /app/backend/server/django_static/;
    }
That’s all. We have configuration file for nginx server.
Docker-compose for Django, Nginx and React
Our docker-compose will run two containers:
- the
nginxcontainer that will runnginxserver on port 80 (defaultHTTPport). Thenginxcontainer has two volumes mounted, one withdjango_staticand one with configuration file (fromdocker/nginx/developmentdirectory). Thenginxcontainer depends onbackendcontainer, which means thatnginxwill start afterbackend(Django app). - the
backendwill run container with Django application. It runs the/app/docker/backend/wsgi-entrypoint.shscript that starts thegunicornserver. Thebackendhasdjango_staticvolume with static files.
We will save our docker-compose in the docker-compose-dev.yml file (in main project directory):
version: '2'

services:
    nginx:
        restart: unless-stopped
        build:
            context: .
            dockerfile: ./docker/nginx/Dockerfile
        ports:
            - 80:80
        volumes:
            - static_volume:/app/backend/server/django_static
            - ./docker/nginx/development:/etc/nginx/conf.d
        depends_on:
            - backend
    backend:
        restart: unless-stopped
        build:
            context: .
            dockerfile: ./docker/backend/Dockerfile
        volumes:

        entrypoint: /app/docker/backend/wsgi-entrypoint.sh
        volumes:
            - static_volume:/app/backend/server/django_static
        expose:
            - 8000

volumes:
    static_volume: {}
There are few useful commands for dealing with docker-compose.
Build containers
docker-compose -f docker-compose-dev.yml build
Please notice that we are using -f docker-compose-dev.yml - it is to point custom yml file. By default docker-compose is reading yml configuration file from docker-compose.yml (we keep default name for production setting).
Run containers
docker-compose -f docker-compose-dev.yml up
Stop containers
docker-compose -f docker-compose-dev.yml down
You can also use Ctrl+C to stop containers if not running in the background.
Build and run containers
docker-compose -f docker-compose-dev.yml up --build
Please build containers and run them with last command. You should see logs from backend and nginx in the terminal.
OK, let’s go into browser and go to http://0.0.0.0 address. You should see the Home view. Let’s try to login:
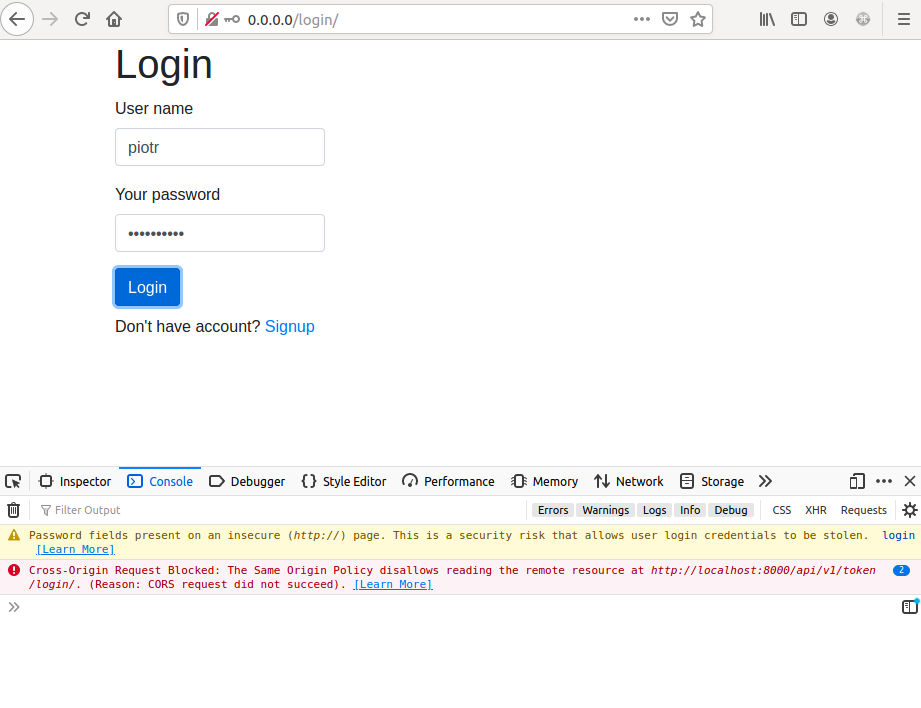
After login attempt you should see toast with error: “Network Error” and some errors in the console.
We need to update our code. We need to set axios configuration to point to correct address of server in the frontend. In the backend, we need to add 0.0.0.0 to ALLOWED_HOSTS (in settings.py file).
Update frontend/src/App.js code.
// frontend/src/App.js
// remove this line
//axios.defaults.baseURL = "http://localhost:8000";

// new code
if (window.location.origin === "http://localhost:3000") {
  axios.defaults.baseURL = "http://127.0.0.1:8000";
} else {
  axios.defaults.baseURL = window.location.origin;
}
In the frontend, we set a logic to point the correct address of the server:
- in the case of development the
axioswill call server athttp://127.0.0.1:8000, - in the production, the
axioswill call server at the same location origin as frontend. Frontend will call in factnginxand it will redirect request to the Django.
In the backend/server/server/settings.py we need to update ALLOWED_HOSTS variable:
# in backend/server/server/settings.py

# ...
ALLOWED_HOSTS = ['0.0.0.0']
# ...
After changes we need stop containers (Ctrl+C) and then rebuild docker containers and run them again.
docker-compose -f docker-compose-dev.yml up --build
Now, if you try to login you should be successful! What is more, you can use this docker-compose and run it on VPS in the cloud and make it available to others. BUT, it will be unsecure! It is using only HTTP. We need to add SSL certificate to make it secure. For this we will create next docker-compose configuration file for production. We also add production nginx configuration file.
Production docker-compose
Let’s add directory production in the docker/nginx/ with default.conf file. It will be a configuration of nginx server to be used in the production:
server {
    listen 80;
    server_name boilerplate.saasitive.com;
    server_tokens off;

    location /.well-known/acme-challenge/ {
        root /var/www/certbot;
    }

    location / {
        return 301 https://$host$request_uri;
    }
}

server {
    listen 443 ssl;
    server_name boilerplate.saasitive.com;
    server_tokens off;

    ssl_certificate /etc/letsencrypt/live/boilerplate.saasitive.com/fullchain.pem;
    ssl_certificate_key /etc/letsencrypt/live/boilerplate.saasitive.com/privkey.pem;
    include /etc/letsencrypt/options-ssl-nginx.conf;
    ssl_dhparam /etc/letsencrypt/ssl-dhparams.pem;

    client_max_body_size 20M;

    location / {
        root   /usr/share/nginx/html;
        index  index.html index.htm;
        try_files $uri $uri/ /index.html;
    }

    location /api {
        try_files $uri @proxy_api;
    }
    location /admin {
        try_files $uri @proxy_api;
    }

    location @proxy_api {
        proxy_set_header X-Forwarded-Proto https;
        proxy_set_header X-Url-Scheme $scheme;
        proxy_set_header X-Forwarded-For $proxy_add_x_forwarded_for;
        proxy_set_header Host $http_host;
        proxy_redirect off;
        proxy_pass   http://backend:8000;
    }

    location /django_static/ {
        autoindex on;
        alias /app/backend/server/django_static/;
    }
}
It is similar to the development configuration. It has two server definitions. The first one:
server {
    listen 80;
    server_name boilerplate.saasitive.com;
    server_tokens off;

    location /.well-known/acme-challenge/ {
        root /var/www/certbot;
    }

    location / {
        return 301 https://$host$request_uri;
    }
}
The above definition listen on port 80 and redirects all requests to HTTPS (return 301 https://$host$request_uri;). In this part there is also a server_name filled to boilerplate.saasitive.com. I’m planning to run the application from this tutorial on boilerplate.saasitive.com domain. You should use here your own domain.. The location /.well-known/acme-challenge/ is used by cerbot for issuing the certificate.
Let’s look closer at second server in the configuration:
server {
    listen 443 ssl;
    server_name boilerplate.saasitive.com;
    server_tokens off;

    ssl_certificate /etc/letsencrypt/live/boilerplate.saasitive.com/fullchain.pem;
    ssl_certificate_key /etc/letsencrypt/live/boilerplate.saasitive.com/privkey.pem;
    include /etc/letsencrypt/options-ssl-nginx.conf;
    ssl_dhparam /etc/letsencrypt/ssl-dhparams.pem;

    client_max_body_size 20M;

    #...
It is listening on 443 port which is default for HTTPS. The server_name is set to domain. There are added paths with certificate. You should rename them to your domain:
    ssl_certificate /etc/letsencrypt/live/---your-domain.com---/fullchain.pem;
    ssl_certificate_key /etc/letsencrypt/live/---your-domain.com---/privkey.pem;
The rest of the configuration is very similar to development configuration, except that we need to set additional headers:
    location @proxy_api {
        proxy_set_header X-Forwarded-Proto https; # additional
        proxy_set_header X-Url-Scheme $scheme; # additional
        proxy_set_header X-Forwarded-For $proxy_add_x_forwarded_for; # additional
        proxy_set_header Host $http_host;
        proxy_redirect off;
        proxy_pass   http://backend:8000;
    }
Let’s add production docker-compose. The docker-compose.yml file in the main project directory:
version: '2'

services:
    nginx:
        restart: unless-stopped
        build:
            context: .
            dockerfile: ./docker/nginx/Dockerfile
        ports:
            - 80:80
            - 443:443
        volumes:
            - static_volume:/app/backend/server/django_static
            - ./docker/nginx/production:/etc/nginx/conf.d
            - ./docker/nginx/certbot/conf:/etc/letsencrypt
            - ./docker/nginx/certbot/www:/var/www/certbot
        depends_on:
            - backend
    certbot:
        image: certbot/certbot
        restart: unless-stopped
        volumes:
            - ./docker/nginx/certbot/conf:/etc/letsencrypt
            - ./docker/nginx/certbot/www:/var/www/certbot
        entrypoint: "/bin/sh -c 'trap exit TERM; while :; do certbot renew; sleep 12h & wait $${!}; done;'"
    backend:
        restart: unless-stopped
        build:
            context: .
            dockerfile: ./docker/backend/Dockerfile
        entrypoint: /app/docker/backend/wsgi-entrypoint.sh
        volumes:
            - static_volume:/app/backend/server/django_static
        expose:
            - 8000

volumes:
    static_volume: {}
The nginx server is listenning on two ports: 80 (HTTP) and 443 (HTTPS). There are added additional volumes in nginx with certificate. There is a new container certbot that is responsible for certificate renewal. There are no changes in the backend container.
OK, to be ready to run docker-compose we need to get the certificate from Let’s Encrypt. I will use for it a bash script init-letsencrypt.sh. The script is from:
- article Nginx and Let’s Encrypt with Docker in Less Than 5 Minutes,
- the Github repository with script: link.
The init-letsencrypt.sh file:
#!/bin/bash

if ! [ -x "$(command -v docker-compose)" ]; then
  echo 'Error: docker-compose is not installed.' >&2
  exit 1
fi

domains=(boilerplate.saasitive.com www.boilerplate.saasitive.com)
rsa_key_size=4096
data_path="./docker/nginx/certbot"
email="" # Adding a valid address is strongly recommended
staging=1 # Set to 1 if you're testing your setup to avoid hitting request limits

if [ -d "$data_path" ]; then
  read -p "Existing data found for $domains. Continue and replace existing certificate? (y/N) " decision
  if [ "$decision" != "Y" ] && [ "$decision" != "y" ]; then
    exit
  fi
fi


if [ ! -e "$data_path/conf/options-ssl-nginx.conf" ] || [ ! -e "$data_path/conf/ssl-dhparams.pem" ]; then
  echo "### Downloading recommended TLS parameters ..."
  mkdir -p "$data_path/conf"
  curl -s https://raw.githubusercontent.com/certbot/certbot/master/certbot-nginx/certbot_nginx/_internal/tls_configs/options-ssl-nginx.conf > "$data_path/conf/options-ssl-nginx.conf"
  curl -s https://raw.githubusercontent.com/certbot/certbot/master/certbot/certbot/ssl-dhparams.pem > "$data_path/conf/ssl-dhparams.pem"
  echo
fi

echo "### Creating dummy certificate for $domains ..."
path="/etc/letsencrypt/live/$domains"
mkdir -p "$data_path/conf/live/$domains"
docker-compose run --rm --entrypoint "\
  openssl req -x509 -nodes -newkey rsa:1024 -days 1\
    -keyout '$path/privkey.pem' \
    -out '$path/fullchain.pem' \
    -subj '/CN=localhost'" certbot
echo


echo "### Starting nginx ..."
docker-compose up --force-recreate -d nginx
echo

echo "### Deleting dummy certificate for $domains ..."
docker-compose run --rm --entrypoint "\
  rm -Rf /etc/letsencrypt/live/$domains && \
  rm -Rf /etc/letsencrypt/archive/$domains && \
  rm -Rf /etc/letsencrypt/renewal/$domains.conf" certbot
echo


echo "### Requesting Let's Encrypt certificate for $domains ..."
#Join $domains to -d args
domain_args=""
for domain in "${domains[@]}"; do
  domain_args="$domain_args -d $domain"
done

# Select appropriate email arg
case "$email" in
  "") email_arg="--register-unsafely-without-email" ;;
  *) email_arg="--email $email" ;;
esac

# Enable staging mode if needed
if [ $staging != "0" ]; then staging_arg="--staging"; fi

docker-compose run --rm --entrypoint "\
  certbot certonly --webroot -w /var/www/certbot \
    $staging_arg \
    $email_arg \
    $domain_args \
    --rsa-key-size $rsa_key_size \
    --agree-tos \
    --force-renewal" certbot
echo

echo "### Reloading nginx ..."
docker-compose exec nginx nginx -s reload
You need to set two variables in the script:
domains=(boilerplate.saasitive.com www.boilerplate.saasitive.com)you should enter your domain here,staging=1- is set to test the configuration first with Let’s encrypt staging environment! It is important to not setstaging=0before you are 100% sure that your configuration is correct. If you are sure, that all is set correctly, setstaging=0. This is because there are limited number of retries to issue the certificate and you don’t want to wait till they are reseted (once a week). To read more about this, check Let’s encrypt rate limits docs.
We will use this script first with staging=1. We will test if web application is running correctly. If yes then we will issue production certificate and run the application with it.
Note: You need to have your own domain in this tutorial. The Let’s Encrypt certificates doesn’t work with public IPs (link to forum topic).
Deploy to VPS
I will use AWS to deploy the project. The application will be deployed to boilerplate.saasitive.com address.
We need to do below steps to deploy application:
- start EC2 instance,
- configure DNS,
- copy code to EC2 instance,
- issue certificate,
- start docker-compose.
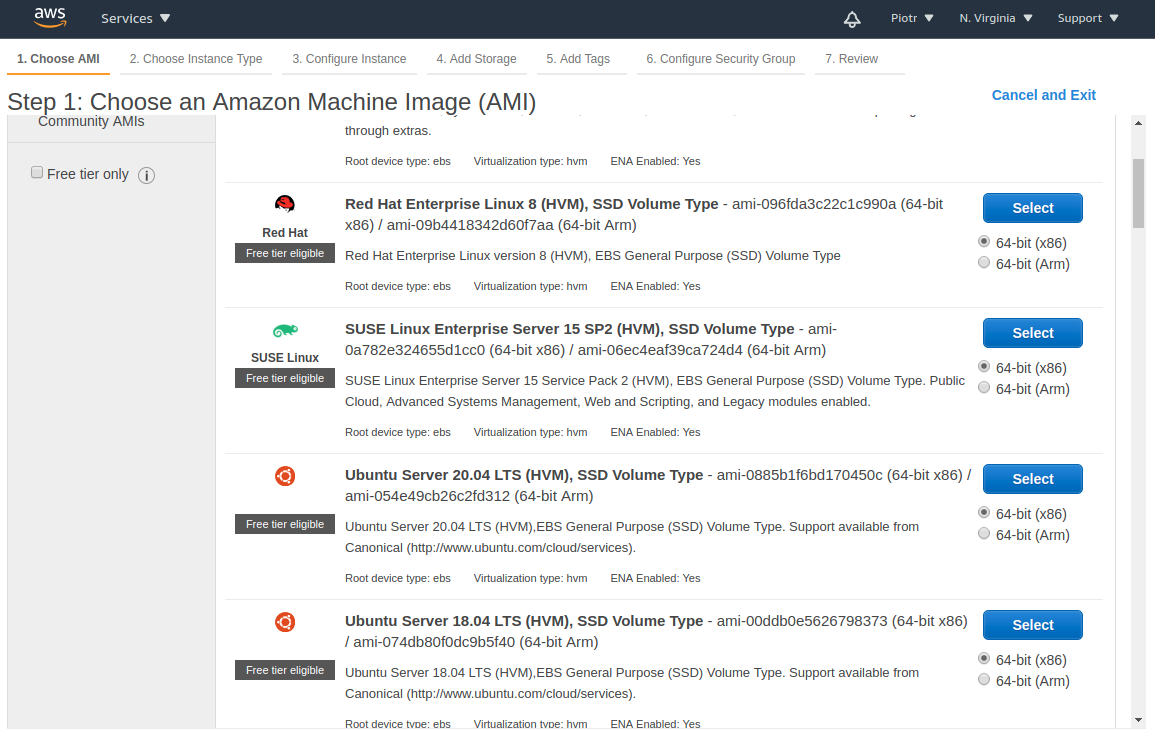
Start EC2 instance
First thing is to start EC2 instance. I’m using t2.micro instance (cant use t2.nano because of too low memory to build containers). Please launch a new EC2 instance. I’m using Ubuntu Server 18.04 LTS as the image (the last image in the screenshot below):
After clicking select, please go with t2.micro instance type (the cost of running is 8.35$ per month). Click Next: Configure Instance Details. In configuration please click Next and stop on Step 6: Configure Security Group. Please add there rules to accept HTTP and HTTPS traffic (like in the image below):

Click Review and Launch and then Launch. You should get the *.pem file for secure connection to the instance. You can use existing key pair or generate the new one. My file is boilerplate.pem. After a few seconds you should see your instance running. Congratulations, you have a VPS running! Now, we will configure domain to point to our VPS.
Configure DNS
In the instances view, please click on your instance and you should see Public IPv4 address. Please copy this address.
Let’s go to Route 53 service in AWS to configure the DNS. I have there Hosted zone configured for saasitive.com domain. I will add there two type A records. Please click on Create record. Then select Simple routing. Click Next and Define simple record. Please give the record name and route traffic to VPS IP, like in the image below:
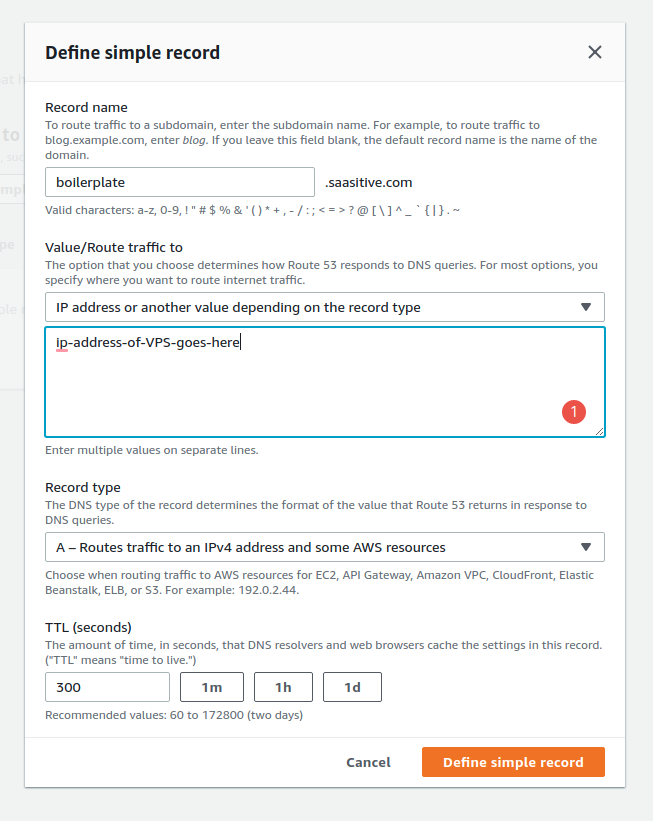
I want to have routing for:
boilerplate.saasitive.comwww.boilerplate.saasitive.com
That’s why I’ve added two records, one for boilerplate and one for www.boilerplate. Both pointing to the same IP.
If you don’t want to run application on subdomain, just point main domain to VPS IP.
Copy code to VPS
We need to have our application code in the VPS to run it. There are many ways to do it. I’m using rsync command. Here is how.
Please select the instance (in EC2 instances list) and click Connect at the top of the website. There should be example how to connect to instance with SSH:
ssh -i "boilerplate.pem" ubuntu@ec2-your-ip.compute-1.amazonaws.com
Please remember to:
- give correct permissions to
*.pemfile:chmod 400 boilerplate.pem, - please replace the name of
*.pemfile to yours.
After ssh, you should be logged in the VPS. Let’s install docker and create the app directory:
sudo snap install docker
mkdir app
In the new console, please navigate to the project directory and rsync it with directory in VPS:
# run locally in project main directory
rsync -avz -progress -e "ssh -i boilerplate.pem" --exclude backend/venv --exclude frontend/node_modules . ubuntu@ec2-your-ip.compute-1.amazonaws.com:/home/ubuntu/app/
The above command sync the current directory (there is a . dot in the command!) with home/ubuntu/app/ directory in the VPS.
That’s all! If you go to terminal with SSH connection to VPS and run ls command in app directory, you should see all your project files.
Issue certificate
Let’s go to VPS SSH connection and go into app directory. In this directory, please first build docker-compose containers:
# run in VPS!
cd app
sudo docker-compose build
First, we will issue certificate from Let’s Encrypt staging environment.
# run in VPS! in app dir
sudo ./init-letsencrypt.sh
If successful, please stop all running containers and run the docker-compose in the background:
# run in VPS! in app dir
sudo docker-compose down
sudo docker-compose up --detach
You should be able to navigate to your website. Please go to web browser and enter your domain (or subdomain). In my case, I will go to https://boilerplate.saasitive.com. You should see warning message (depending on your web browser) that will tell you that connection is insecure:
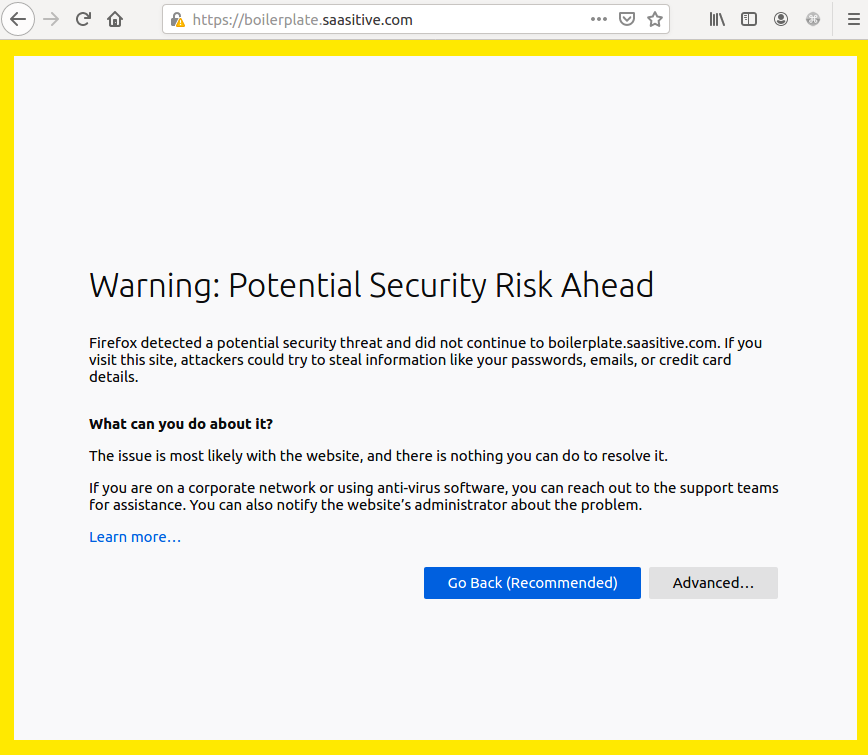
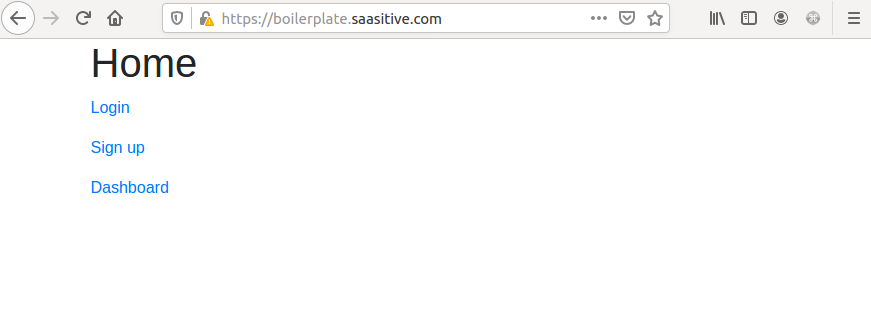
To see the website, you need to go into advanced options and accept the risk. After that, you should see the application:
We need to issue production-ready certificate. Let’s go to VPS and stop containers:
# run in VPS! in app dir
# stop containers
sudo docker-compose down
You need to edit init-letsencrypt.sh file and set staging=0. Then run the script:
# run in VPS! in app dir
sudo ./init-letsencrypt.sh
Once again, stop containers and run them in the background:
# run in VPS! in app dir
sudo docker-compose down
sudo docker-compose up --detach
Let’s refresh the web browser:
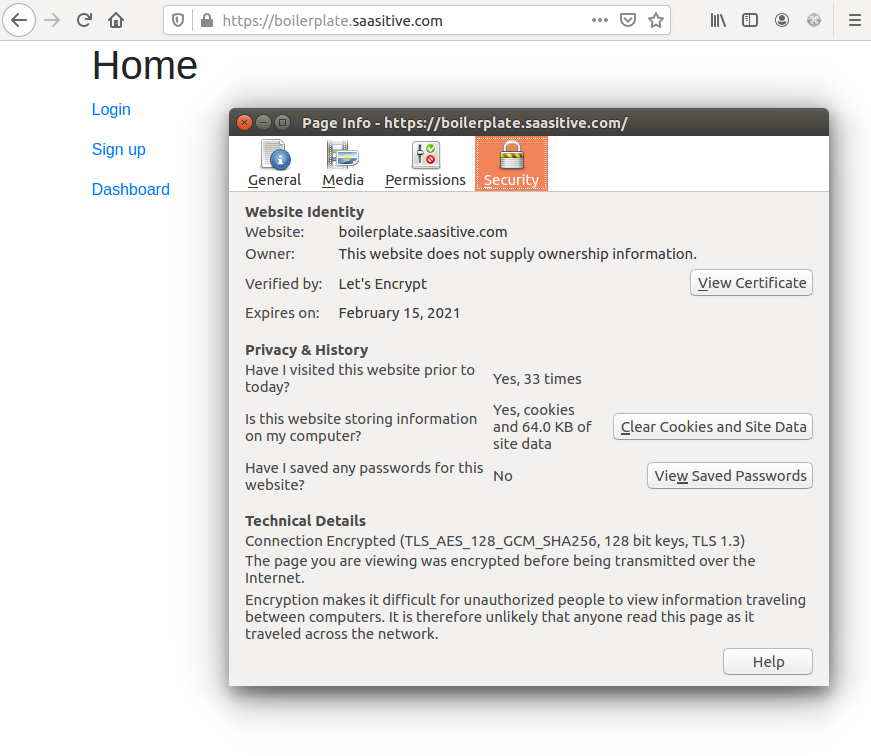
Great, the application is running with HTTPS! What is more, if you enter URL with http:// you will be redirected to https://! Nice!
Is it working correctly? Please try to login or signup …
Ups, there is some error …
Edit ALLOWED_HOSTS
One more thing, we need to add boilerplate.saasitive.com and www.boilerplate.saasitive.com to the ALLOWED_HOSTS in Django settings.py file. And, there is a DEBUG flag in settings.py. Please set it to False.
# backend/server/server/settings.py

# ...
DEBUG=False

ALLOWED_HOSTS = ['0.0.0.0', 'boilerplate.saasitive.com', 'www.boilerplate.saasitive.com']
# ...
Save the file and sync the code on VPS.
# sync code
rsync -avz -progress -e "ssh -i boilerplate.pem" --exclude backend/venv --exclude frontend/node_modules . ubuntu@ec2-your-ip.compute-1.amazonaws.com:/home/ubuntu/app/
On VPS machine, please stop docker, build it and re-run in the background:
# run in VPS! in app dir

# stop containers
sudo docker-compose down

# build containers
sudo docker-compose build

# run containers
sudo docker-compose up --detach
Please try to login after update:

You can try to create new users and login for example from your phone web browser. The application will be working!!! :)
Commit changes to the repository code
Please remember to commit changes to the repository:
# in the main project dir

git add docker-compose*
git add init-letsencrypt.sh
git add docker

git commit -am "add docker-compose"
git push
Summary
- We’ve created two
docker-composeconfigurations, one for development and one for production. - The production
docker-composehas SSL certificate from Let’s Encrypt. - We’ve deployed application to AWS EC2 instance with
docker-compose. - There are still many things to be added in the project.
- We need to better handle configuration variables and
SECRET_KEYin the Django code. We will add this in the future post with python-decouple package. - We need to switch database engine to PostgreSQL.
- After every update in the application, we will need to run a set of commands. This can be boring and error-prone. That’s why we will need to add Continous Integration (CI) to our project. This can be added in many different ways, I will try to figure out the simplest approach (usually, I go with bash scripts). I’m open to your suggestions.
- It is important to remember that if EC2 machine is restarted, then new IP address is assigned. So there is a need to reconfigure DNS again. This can be prevented with static IP address. But, you need to pay for it additionally. I’m not setting the static IP. I’m planning to write custom blue/green deployment script (in the future post).
What’s next?
In the next article we will extend user model.
Let's stay in touch!
Would you like to be notified about new posts? Please fill this form.
Boilerplate Tutorial Articles:
1. Starting SaaS with Django and React
2. React Routing and Components for Signup and
Login
3. Token Based Authentication with
Django Rest Framework and Djoser
4. React Token Based Authentication to Django REST
API Backend
5. React Authenticated Component
6. CRUD in Django Rest Framework and React
7. Docker-Compose for Django and React with
Nginx reverse-proxy and Let's encrypt certificate
(↩ you are here!)
8. Django Rest Framework Email Verification
9. Django Rest Framework Reset Password
More articles coming soon!
Link to the code repository: saasitive/django-react-boilerplate