 Celery is a popular distributed tasks queue. It is often used with Django framework to process heavy computational tasks in the background. You can add a single task to the queue or define periodic tasks. Periodic tasks are automatically scheduled for execution based on set time. The most common approach is to define the periodic tasks before the Celery worker is started. For example, it can be daily cleaning of the database. What if we would like to define periodic tasks dynamically? Recently, I’ve been working on a web app for uptime monitoring. The service continuously monitors a server and send email notification when the server is down. In the web app, the user can add a server address to be monitored and select the interval between requests to the server. How to dynamically add periodic tasks in Celery? I want to describe my approach in this article.
Overview
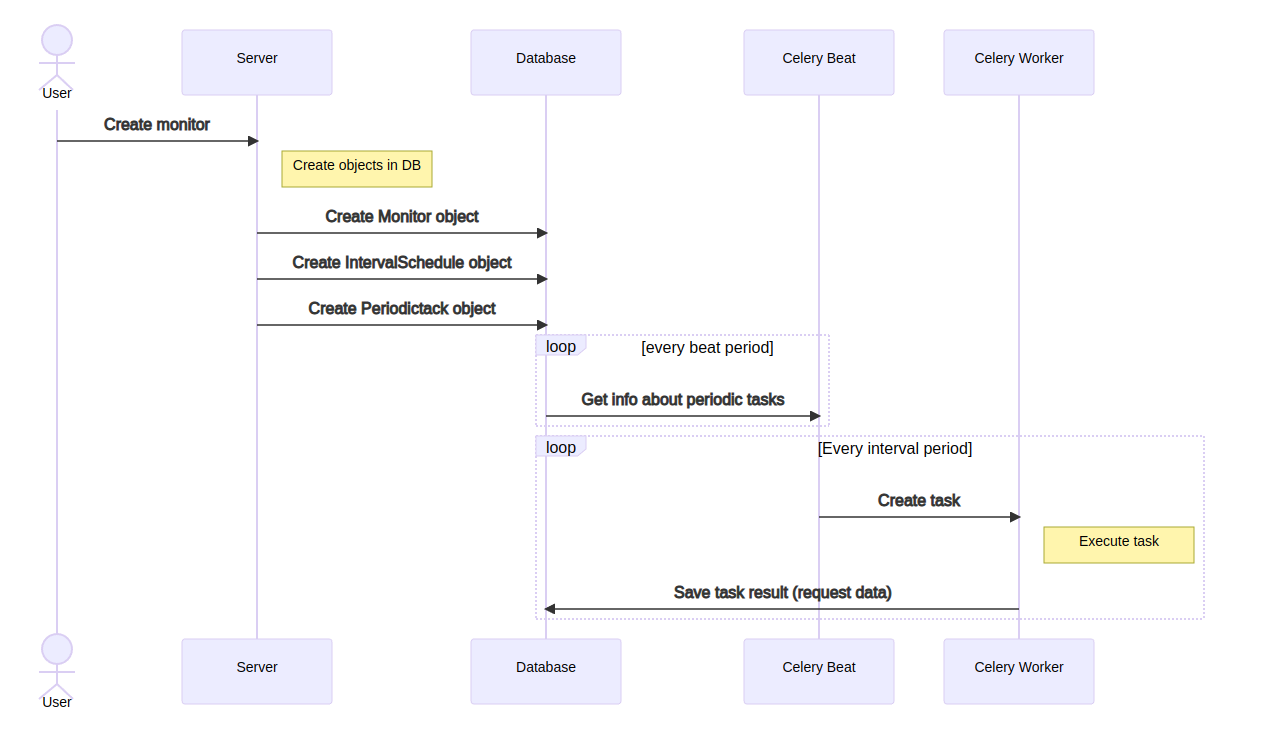
The uptime monitoring idea is simple. The user defines the server address, for example https://github.com and interval. Every time period, a request is made to the server. We store in the database the information about response time and status. There can be monitored multiple servers, each at a different interval. Moreover, the user can add or delete monitored addresses at any time. Here is a sequence diagram of my approach.
Start Django project
In this article, I will create a Django application with simple monitoring functionality to show you my approach for dynamic periodic tasks in Celery and Django. All code for this article is available in public GitHub repository.
Please set up a new Python virtual environment:
virtualenv dynenv --python=python3.8

source dynenv/bin/activate
We need to install the required packages:
djangofor web app development,djangorestframework,markdown,django-filterfor Django Rest Framework,celery,django-celery-beat,gevent,sqlalchemyfor background tasks processing,requeststo make HTTP requests.
Please install the following packages:
pip install django djangorestframework markdown django-filter celery django-celery-beat gevent sqlalchemy requests
It is a good practice to add required packages into the
requirements.txtfile.
We need to initialize the Django project with the django-admin command line tool:
django-admin startproject backend
Please change the directory to the backend and create a new app:
python manage.py startup monitors
We need to setup the Django to use a newly generated monitors app. Please update the INSTALLED_APPS in the backend/settings.py file:
# the rest of the code ...

INSTALLED_APPS = [
    "django.contrib.admin",
    "django.contrib.auth",
    "django.contrib.contenttypes",
    "django.contrib.sessions",
    "django.contrib.messages",
    "django.contrib.staticfiles",
    # 3rd party
    "rest_framework",
    "django_celery_beat",
    # apps
    "monitors",
]

# the rest of the code ...
We added to the INSTALLED_APPS:
rest_framework- package for faster REST API development,django_celery_beat- package that providesPeriodicTaskmodel,monitors- our new package.
Monitor database model
We will need two database models:
Monitor- a model for storing information about the monitored address and time interval between checks,MonitorRequest- model to keep response time and status.
The backend/monitors/models.py file content:
from django.db import models
from django_celery_beat.models import PeriodicTask


class Monitor(models.Model):

    # monitored endpoint
    endpoint = models.CharField(max_length=1024, blank=False)

    # interval in seconds
    # enpoint will be checked every specified interval time period
    interval = models.IntegerField(blank=False)

    task = models.OneToOneField(
        PeriodicTask, null=True, blank=True, on_delete=models.SET_NULL
    )

    created_at = models.DateTimeField(auto_now_add=True)


class MonitorRequest(models.Model):

    # endpoint response time in miliseconds
    response_time = models.IntegerField(blank=False)

    response_status = models.IntegerField(blank=False)

    monitor = models.ForeignKey(Monitor, on_delete=models.CASCADE)

    created_at = models.DateTimeField(auto_now_add=True)
Please notice that Monitor has one-to-one relationship with PeriodicTask.
task = models.OneToOneField(
    PeriodicTask, null=True, blank=True, on_delete=models.SET_NULL
)
The PeriodicTask will be used to inform Celery about task execution and its frequency.
When the end-user adds a new server address for monitoring the Monitor object will be created in the database. The server address will be stored in the endpoint field. The interval field is in seconds.
Each request to the server will be saved in the database as a MonitorRequest object. We will store response time (in milliseconds) and status.
We will need to add serializers, views and URLs to have REST API available for Monitor and MonitorRequest.
Please add a new file serializers.py in the backend/monitors directory:
from rest_framework import serializers

from monitors.models import Monitor, MonitorRequest


class MonitorSerializer(serializers.ModelSerializer):
    class Meta:
        model = Monitor
        read_only_fields = ("id", "created_at")
        fields = (
            "id",
            "created_at",
            "endpoint",
            "interval",
        )


class MonitorRequestSerializer(serializers.ModelSerializer):
    monitor_endpoint = serializers.SerializerMethodField()

    def get_monitor_endpoint(self, obj):
        return obj.monitor.endpoint

    class Meta:
        model = MonitorRequest
        read_only_fields = ("id", "created_at")
        fields = (
            "id",
            "created_at",
            "response_time",
            "response_status",
            "monitor_endpoint",
        )
The serializers will just return available fields. The next step is to edit backend/monitors/views.py:
import json

from django.db import transaction
from django.shortcuts import render
from django_celery_beat.models import IntervalSchedule, PeriodicTask
from rest_framework import viewsets
from rest_framework.exceptions import APIException

from monitors.models import Monitor, MonitorRequest
from monitors.serializers import MonitorRequestSerializer, MonitorSerializer


class MonitorViewSet(viewsets.ModelViewSet):

    serializer_class = MonitorSerializer
    queryset = Monitor.objects.all()

    def perform_create(self, serializer):
        try:
            with transaction.atomic():

                instance = serializer.save()
                schedule, created = IntervalSchedule.objects.get_or_create(
                    every=instance.interval,
                    period=IntervalSchedule.SECONDS,
                )

                task = PeriodicTask.objects.create(
                    interval=schedule,
                    name=f"Monitor: {instance.endpoint}",
                    task="monitors.tasks.task_monitor",
                    kwargs=json.dumps(
                        {
                            "monitor_id": instance.id,
                        }
                    ),
                )
                instance.task = task
                instance.save()

        except Exception as e:
            raise APIException(str(e))

    def perform_destroy(self, instance):
        if instance.task is not None:
            instance.task.delete()
        return super().perform_destroy(instance)


class MonitorRequestViewSet(viewsets.ModelViewSet):

    serializer_class = MonitorRequestSerializer
    queryset = MonitorRequest.objects.all()
We have two views. The MonitorRequestViewSet derives from ModelViewSet and doesn’t overwrite any functions. It is simple CRUD for MonitorRequest objects.
The MonitorViewSet overwrites perform_create(self, serializer) and perform_destroy(self, instance). During monitor creation, a PeriodicTask instance is created. The PeriodicTask instance requires an IntervalSchedule object. The IntervalSchedule defines the time period between every task execution.
with transaction.atomic():

    instance = serializer.save()

    # create `IntervalSchedule` obejct
    schedule, created = IntervalSchedule.objects.get_or_create(
        every=instance.interval,
        period=IntervalSchedule.SECONDS,
    )

    # create `PeriodicTask` object
    task = PeriodicTask.objects.create(
        interval=schedule,
        name=f"Monitor: {instance.endpoint}",
        task="monitors.tasks.task_monitor",
        kwargs=json.dumps(
            {
                "monitor_id": instance.id,
            }
        ),
    )
    # save task in monitor object
    instance.task = task
    instance.save()
During the PeriodicTask object creation, we pass the task function signature monitors.tasks.task_monitor and define kwargs. We will implement the task_monitor in a moment.
The last step is to define urls.py in the backend/monitors:
from django.urls import re_path
from rest_framework.routers import DefaultRouter

from monitors.views import MonitorRequestViewSet, MonitorViewSet

router = DefaultRouter()
router.register(r"monitors", MonitorViewSet)
router.register(r"requests", MonitorRequestViewSet)
monitors_urlpatterns = router.urls
We used DefaultRouter from Django Rest Framework. A basic viewer for REST API for monitors and requests will be generated by DRF.
We need to add monitors_urlpatterns in the backend/backend/urls.py to make them available in the Django application.
from django.contrib import admin
from django.urls import path

from monitors.urls import monitors_urlpatterns

urlpatterns = [
    path("admin/", admin.site.urls),
]

urlpatterns += monitors_urlpatterns
Please make migrations and apply them:
# please run in the backend directory

python manage.py makemigrations

python manage.py migrate
Celery configuration
We need to configure the Celery framework. Please add a new file celery.py in the backend/backend directory:
import os
import sys

from celery import Celery

CURRENT_DIR = os.path.dirname(os.path.dirname(os.path.abspath(__file__)))
sys.path.insert(0, CURRENT_DIR)
os.environ.setdefault("DJANGO_SETTINGS_MODULE", "backend.settings")

app = Celery("backend")

app.config_from_object("django.conf:settings", namespace="CELERY")

app.autodiscover_tasks()
In the backend/backend/settings.py please add the Celery configuration:
# the rest of the code ...

# celery broker and results in sqlite
CELERY_BROKER_URL = "sqla+sqlite:///celery.sqlite"
CELERY_RESULT_BACKEND = "db+sqlite:///celery.sqlite"
We will use SQLite as a broker and results backend.
It is an example project showing how to use
PeriodicTask, thus broker and results backend performance is out of the scope of this article.
We have the Celery configuration completed.
Background task
Please add the tasks.py file in the backend/monitors directory:
from datetime import datetime, timedelta
from decimal import Decimal

import requests
from celery import shared_task

from monitors.models import Monitor, MonitorRequest


@shared_task(bind=True)
def task_monitor(self, monitor_id):

    try:

        monitor = Monitor.objects.get(pk=monitor_id)

        response = requests.get(monitor.endpoint, timeout=60)

        MonitorRequest.objects.create(
            response_time=int(response.elapsed.total_seconds() * 1000),
            response_status=response.status_code,
            monitor=monitor,
        )

    except Exception as e:
        print(str(e), type(e))
The task_monitor(self, monitor_id) function has @shared_task decorator. It accepts monitor_id as an argument - it is passed when PeriodicTask is created as a kwargs field.
The task_monitor sends a GET request to the monitored server and saves response time and status. It is a simplified version of task_monitor used in my uptime monitoring service.
Run Django and Celery
We are ready to play with our web application. You will need three terminals. Please start the Django development server in the first one:
python manage.py runserver
In the second terminal, please start the Celery worker:
celery -A backend worker --loglevel=info -P gevent --concurrency 1 -E
In the third terminal, please start Celery beat:
celery -A backend beat -l INFO --scheduler django_celery_beat.schedulers:DatabaseScheduler --max-interval 10
Celery beat service uses
DatabaseSchedulerfromdjango-celery-beatpackage. The beat service checks scheduled tasks from the database. Tasks defined withPeriodicTaskare persistent. Tasks will be available even after the Celery worker and beat restart.
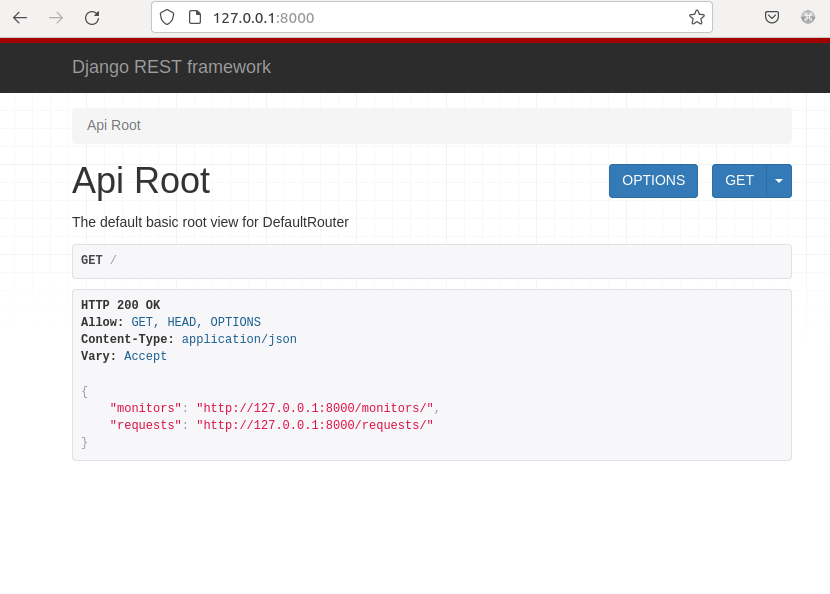
Please open your (favorite) web browser and enter the address http://127.0.0.1:8000. You should see the REST API viewer automatically generated by DRF:
If you have problems or need help, please create a GitHub issue. We will try to help you! You won’t be alone.
Please open the monitors API at http://127.0.0.1:8000/monitors/1/. The list of monitors should be empty; let’s add the first monitor. Please fill out the form and click the POST button.
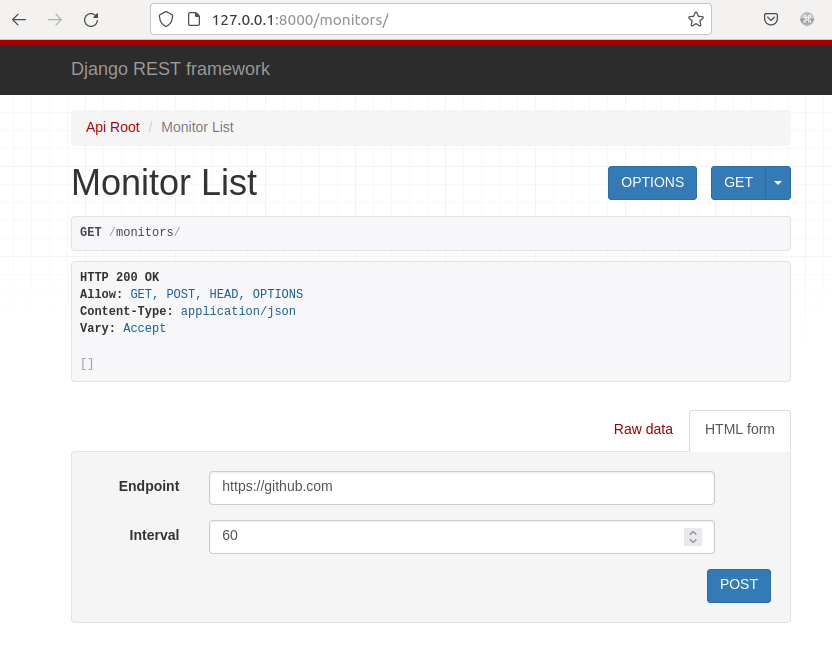
Please wait some time to have some results, and you should see in the Celery beat terminal:
[2022-10-17 12:05:59,887: INFO/MainProcess] Scheduler: Sending due task Monitor: https://github.com (monitors.tasks.task_monitor)
[2022-10-17 12:06:59,887: INFO/MainProcess] Scheduler: Sending due task Monitor: https://github.com (monitors.tasks.task_monitor)
[2022-10-17 12:07:59,909: INFO/MainProcess] Scheduler: Sending due task Monitor: https://github.com (monitors.tasks.task_monitor)
[2022-10-17 12:08:59,909: INFO/MainProcess] Scheduler: Sending due task Monitor: https://github.com (monitors.tasks.task_monitor)
[2022-10-17 12:09:59,914: INFO/MainProcess] Scheduler: Sending due task Monitor: https://github.com (monitors.tasks.task_monitor)
Example output for Celery worker terminal:
[2022-10-17 12:08:00,644: INFO/MainProcess] Task monitors.tasks.task_monitor[e8ea92d4-e834-4bdf-8f4a-af6ee0601b55] received
[2022-10-17 12:08:01,304: INFO/MainProcess] Task monitors.tasks.task_monitor[e8ea92d4-e834-4bdf-8f4a-af6ee0601b55] succeeded in 0.65664959300193s: None
[2022-10-17 12:09:00,101: INFO/MainProcess] Task monitors.tasks.task_monitor[8c597c74-4917-4f3e-894f-a6ae117fc0f3] received
[2022-10-17 12:09:01,909: INFO/MainProcess] Task monitors.tasks.task_monitor[8c597c74-4917-4f3e-894f-a6ae117fc0f3] succeeded in 1.8063794959998631s: None
[2022-10-17 12:10:00,604: INFO/MainProcess] Task monitors.tasks.task_monitor[739f9227-4b63-409d-9d72-57720c2da5f0] received
[2022-10-17 12:10:00,873: INFO/MainProcess] Task monitors.tasks.task_monitor[739f9227-4b63-409d-9d72-57720c2da5f0] succeeded in 0.2661438309987716s: None
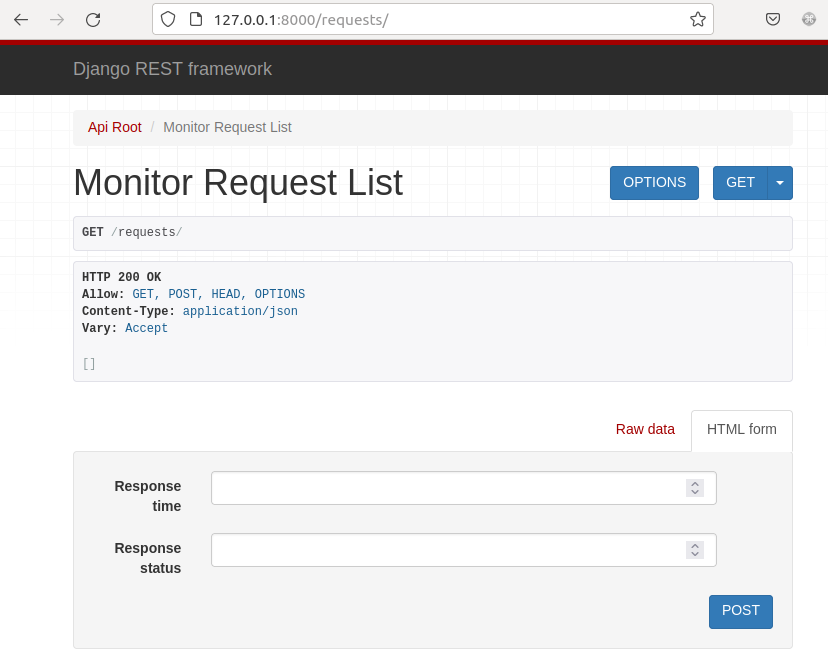
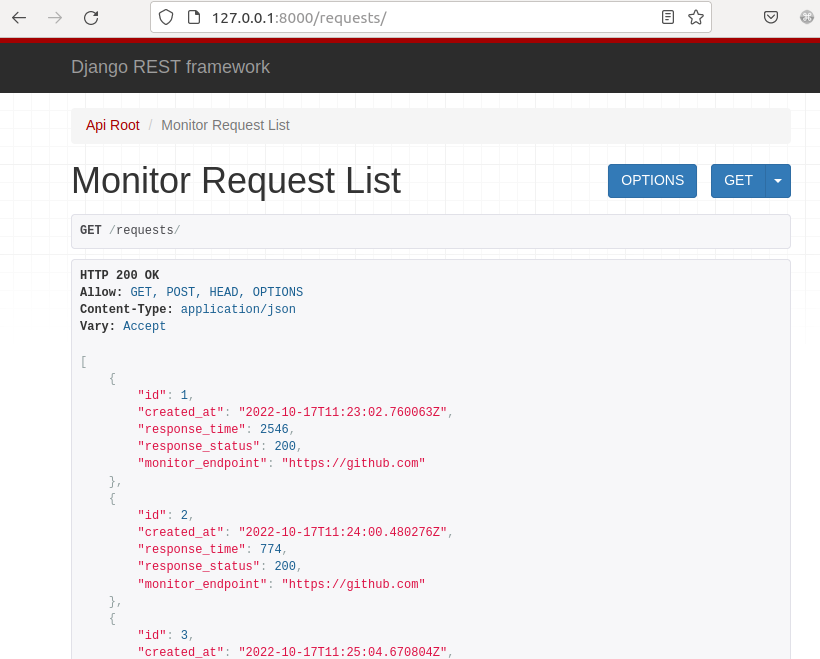
Please open requests API at http://127.0.0.1:8000/requests/ at the beginnig you will see only an empty list:
After some time, it will be filled with requests data:
You can stop the monitoring task by deleting the monitor. Please open the http://127.0.0.1:8000/monitors/1/ (where 1 is monitor ID) and click the Delete button.
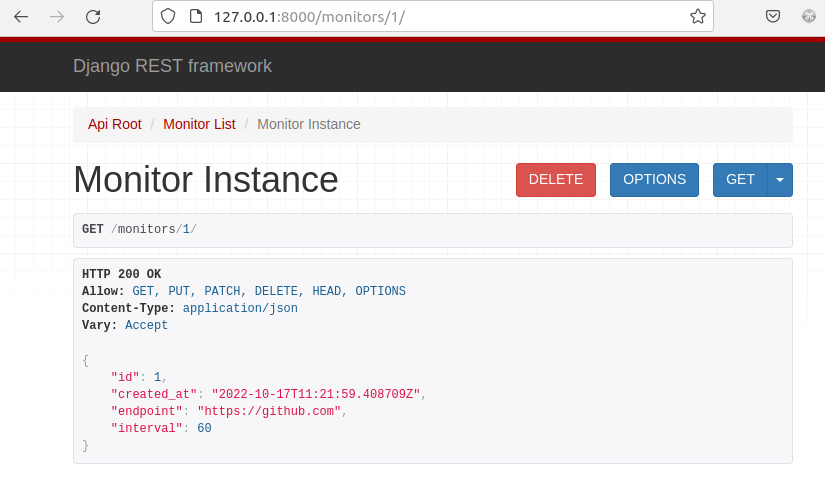
You should see that no more requests are produced. The monitor and an associated PeriodicTask object have been removed. The code for this article is available in the GitHub repository.
To check periodic tasks, you can open the Django Admin Panel at
http://127.0.0.1:8000/admin.
Summary
Celery is a great task queue. You can dynamically create or delete periodic tasks with the django-celery-beat package without Celery restart. What is more, the PeriodicTask object allows you to dynamically change the interval values and pause the task (it was not described in this article). These features were very helpful for me while implementing the uptime monitoring service.
Let's stay in touch!
Would you like to be notified about new posts? Please fill this form.

